http://www.youtube.com/user/GMCNerfProj?feature=mhee
Thursday, April 19, 2012
Nerf Longshot Mod Guide
This is my Mod Guide on the Nerf Longshot. Any questions post a comment.
Sorry for the bad quality. Great quality video at my channel
http://www.youtube.com/user/GMCNerfProj?feature=mhee
http://www.youtube.com/user/GMCNerfProj?feature=mhee
Saturday, April 7, 2012
Some more elite pics!


Tuesday, April 3, 2012
Nerf Vortex Proton Mod Guide
The new Vortex blasters by Nerf have made quite a stir in the Nerfing community. This new design and ammo type makes for a unique kind of function of the mechanics of the blaster. The important thing to realize when modding these blasters is that they are designed for distance, not necessarily speed. The discs will travel far but not nearly as fast as say a modded Nite Finder. The equivalent to the Nite Finder (single shot pull back design) in the Vortex line is the Proton. In this guide, I will be showing you how to make your Proton fire faster, farther, and smoother with no supplies other that a Philips head screwdriver and your Proton. Now lets get started.


Now what you need to do is take the plastic arm and gently bend it over the white buffer.


Start by unscrewing the two screws on the muzzle of the blaster (Your welcome warden :D ).

Then continue to unscrew all the other body screws

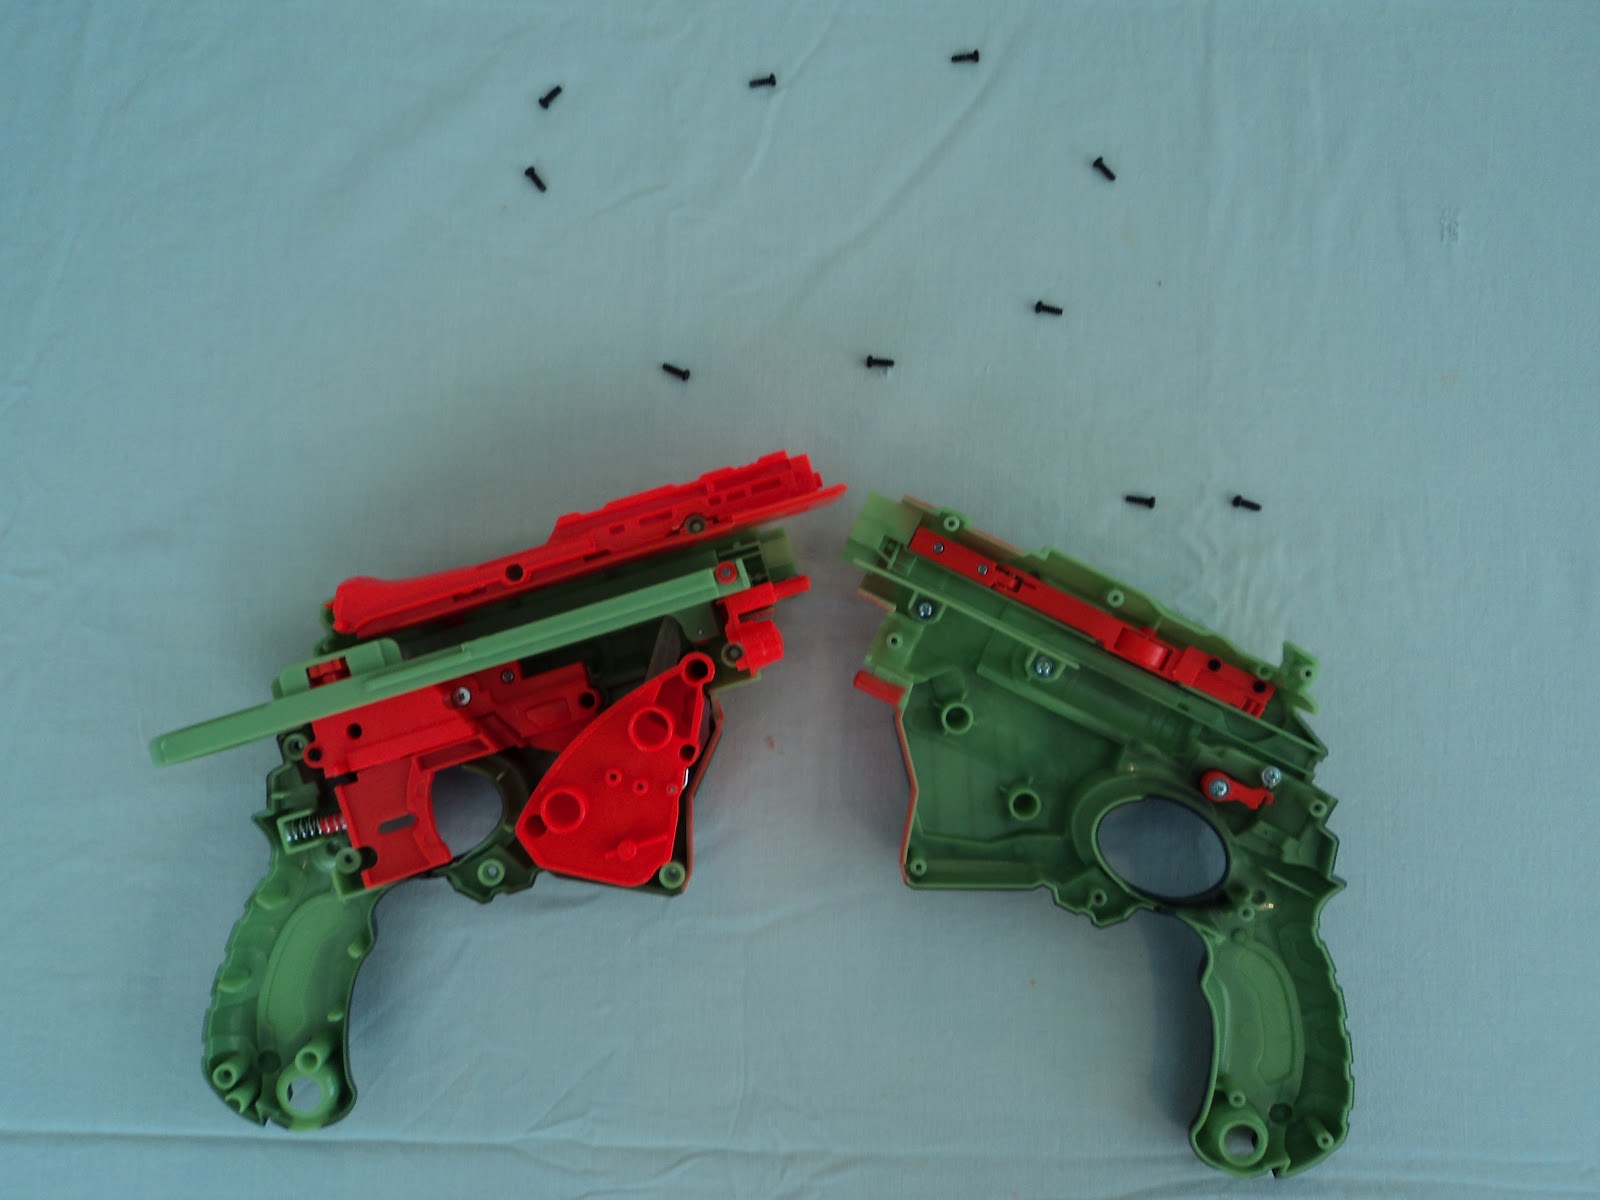
Keep in mind that the screws are on the other side of the shell than the internals. Now that we are on the inside lets start with the trigger box. Start by unscrewing these three screws, and removing the trigger spring. It is always helpful to place screws off to the side in the same shape in which they were in the blaster.

Then remove the trigger box. This is where almost all the locks for this blaster are located.

Now remove the other three screws and set those aside. Before you open the trigger box, you have to realize that most likely when you open it, everything will pop out in a hail of springs and locks. If you open in a box or something, the spring can be contained more easily.

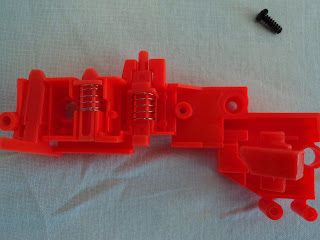
Now that you have it open I will go through what each lock does.

(From top left to top right)
The first lock holds your slide back when you prime the blaster until you hit the orange release on the side to load a disk.
The second lock makes it so that you cant pull the trigger unless the slide is all the way forward, if you wan't to be able to de-prime you blaster to avoid dry firing, you need to take this one out.
The third lock makes it so that you can't pull the trigger unless there is a disk in the chamber(also should be removed to be able to de-prime the blaster)
The forth one is you catch. This is ESSENTIAL to the blaster function. make sure you keep track of that and its longer spring.
You can determine for yourself what locks you wan't to remove or keep in your blaster. Now screw in these three screws to hold you trigger box together.

Then just put it aside since we need to get to a different lock behind it latter. Keep track of these three screws.
Now onto the power mod. The great thing about these Vortex blaster is that you don't need any materials to make them shoot farther. Nerf even been nice enough to put the proper screw ports where they are needed. To do this mod remove the spring mechanism .

There are two screws holding it in.


At this point in the mod is where you choose how much power you want to put in your blaster. Unscrew the one Philips head washer screw and move the metal arm to the left. You can put it either on the second or third screw ports (the farther to the left you put the spring, the more power you will put in your blaster). I personally put it on the third screw port because since we are not putting in an after market spring, this extra power is not enough (with proper use) to easily break your blaster. Keep in mind that over time though, everything breaks down.


Next you gently push your plastic arm back over the white buffer

We are now done with the power mod, but before you put the spring mech back in the blaster, if you want to be able to de-prime the blaster, we need to remove one more lock.
First you remove this Philips head washer screw (you don't need to completely remove the slide by unscrewing it's return spring. Just push it out of the way). Once the slide is out of the way you should see this.

Remove the other two screws (one of mine fell out) and take out the lock entirely.

Now just replace the slide and your internals should look like this.

Now re-screw the trigger box and spring mech into place

Place on the other half of the shell and then flip the blaster over to re-screw the body screws in, then your done!


With these new mods in, the proton should hit about the same ranges as a modded Nite Finder. It is best to avoid dry firing if you took out the locks, since this will wear down your blaster.
Go pone some noobs with you new blaster and come back to nerfetc for the next guide, coming soon, on how to make a clip system for the Proton, and more.
Also, if you have absolutely any questions about Nerf, just message me or post a comment below. If you wan't a mod guide posted for just about any blaster, post a comment below.
If at any time you wan't a blaster modded and or painted for a very cheap price, or just a stock gun at lower than retail cost, just message me on Youtube. My account is Gmcnerfproj. I have a large supply of used and new Nerf blasters. Nerf responsibly
-GMC Nerf Project
Subscribe to:
Comments (Atom)